
SYDNEY DECKING SOLUTIONS
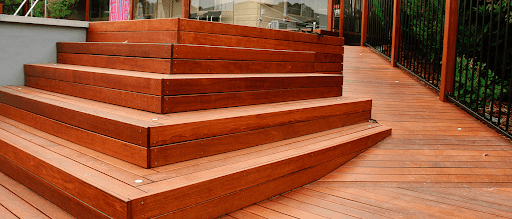
If you have a timber deck that looks worn out or faded, you might be wondering how to restore decking timber. Restoring your deck can bring back its beauty and make it a great place to relax or entertain. With some simple steps and the right tools, you can give your old deck a fresh new look. This guide will help you understand the process and provide tips for getting the best results.
In this beginner’s guide, we will walk you through the steps needed to restore your timber deck. You will learn about cleaning, sanding, and applying finishes that protect the wood. Whether your deck is made from hardwood or softwood, these tips will help you bring it back to life. Let’s get started on your journey to a beautiful, restored timber deck!
What is Timber Deck Restoration?
Timber deck restoration is the process of bringing an old or damaged wooden deck back to life. Over time, decks can suffer from weather damage, fading, and wear and tear. This can make them look dull and unsafe. Timber deck restoration helps to repair these issues, making the deck look beautiful and usable again. It involves cleaning, repairing, and applying protective coatings to the wood.
Timber deck restoration not only improves the look of your deck but also extends its life. Regular maintenance is key to keeping your deck in good shape. By learning how to restore decking timber, you can enjoy your outdoor space for many years to come. A well-restored deck can be a great place for family gatherings, barbecues, or simply relaxing in the sun.
How to Restore Decking Timber: Tools and Materials You’ll Need
Restoring your decking timber can make your outdoor space look fresh and inviting again. To get started, you will need some important tools and materials. Each item plays a special role in the timber deck restoration process.
First, you will need cleaning tools. A broom or a leaf blower will help you remove dirt and debris from the surface of the deck. After that, a scrub brush is essential for scrubbing away any stains or mildew. You might also want a pressure washer. This tool can clean the timber more deeply and remove tough grime. Using these cleaning tools is the first step in learning how to restore decking timber.
Next, sanding tools are very important. A power sander will help smooth out rough spots on the wood. If you don’t have a power sander, you can use sandpaper instead. Choose medium to fine grit sandpaper for the best results. Sanding makes the surface even and prepares it for finishing. This step is crucial in timber deck restoration because it helps the new stain or sealant stick better.
After cleaning and sanding, you will need supplies for staining and sealing the wood. A good quality wood stain will protect your deck and enhance its colour. You will also need a paintbrush or a roller to apply the stain evenly. A sealant is important too, as it protects the wood from water damage and UV rays. These materials are key to ensuring your timber deck restoration lasts for a long time.
Don’t forget about safety gear! Wearing gloves will protect your hands from chemicals in the stain and sealant. Safety goggles are also important to protect your eyes from dust while sanding. A mask can help you avoid breathing in any harmful particles. Using safety gear is an essential part of how to restore decking timber safely.

A Step-by-step Guide On How to Restore Decking Timber
Learning how to restore decking timber is a rewarding project that can enhance the beauty and longevity of your deck. Here’s a simple guide to help you through the process.
Step 1: Gather Your Supplies
Before you start, gather all the supplies you will need. You will need a broom, a pressure washer or a hose, a deck cleaner, sandpaper or a power sander, wood stain or sealant, and a paintbrush or roller. Having everything ready will make the process smoother and quicker. Make sure to wear gloves and safety glasses to protect yourself.
Step 2: Clean the Deck
The first step in timber deck restoration is to clean the surface. Use a broom to sweep away dirt, leaves, and debris. If you have a pressure washer, use it to remove grime and old stains. If you don’t have one, a hose with a strong spray will work too. After washing, apply a deck cleaner according to the instructions on the bottle. This will help remove any mould or mildew. Rinse the deck thoroughly and let it dry completely before moving on.
Step 3: Inspect for Damage
Once the deck is clean and dry, inspect it for damage. Look for any loose boards, cracks, or splinters. If you find any loose boards, tighten them with screws. For cracks or splinters, you can use wood filler to repair the damaged areas. Allow the filler to dry as per the instructions. This step is important to ensure your deck is safe and looks good after restoration.
Step 4: Sand the Surface
Next, it’s time to sand the deck. This step helps to smooth out any rough spots and prepares the wood for staining. If you are using sandpaper, start with a coarse grit and then move to a finer grit. If you have a power sander, it will make the job easier. Sand in the direction of the wood grain to avoid scratches. After sanding, make sure to clean up the dust with a broom or vacuum.
Step 5: Apply Stain or Sealant
Now comes the fun part: applying stain or sealant. Choose a colour that matches your style and enhances the wood’s natural beauty. Using a paint brush or roller, apply the stain evenly across the deck. Make sure to cover all areas, including corners and edges. Follow the instructions on the product for drying times. You may need to apply a second coat for better coverage and protection.
Step 6: Let It Dry and Enjoy
After applying the stain or sealant, allow the deck to dry completely. This may take several hours or even a day, depending on the weather. Once it’s dry, your timber deck restoration is complete! Enjoy your beautiful, restored deck. You can add furniture, plants, or decorations to make your outdoor space inviting and cosy.
By following these simple steps on how to restore decking timber, you can transform your deck into a stunning area for relaxation and entertainment. Remember to maintain your deck regularly to keep it looking great for years to come.

The Importance of Timber Deck Restoration
Knowing how to restore decking timber is essential for any homeowner. The process usually starts with cleaning the deck to remove dirt, mould, and old stains. Next, you may need to sand the surface to make it smooth again. After that, applying a good quality sealant or stain will protect the wood from rain and sun. This not only enhances the beauty of the deck but also extends its life.
Regular timber deck restoration is key to maintaining your outdoor space. A well-maintained deck can add value to your home and make it more enjoyable for family and friends. Plus, a restored deck is safer to walk on, reducing the risk of slips and falls. Taking the time to care for your timber deck will ensure it remains a lovely place for gatherings and relaxation for years to come.
Conclusion
Timber deck restoration is an important task for any homeowner with a wooden deck. By learning how to restore decking timber, you can keep your outdoor space looking its best and extend its lifespan. The process involves cleaning the fibre, sanding, and sealing or staining the wood to protect it from the elements.
Regular maintenance is key to ensuring your timber deck remains in top condition. With a little time and effort, you can restore a deck to its former glory and enjoy it for many years to come. So why not give it a try and see the difference a restored deck can make to your outdoor living space?
FAQS
The steps to reviving a tired timber deck include preparing the deck by cleaning the surface, removing old coatings, and checking for damaged boards. You can use a pressure washer to clean the deck, and if needed, apply a wood stripper to remove stubborn stains. Once the deck is clean and dry, you can sand the surface and apply your desired look with deck oil or stain.
To remove old paint or stain, you can use a paint stripper or a wood stripper that is suitable for your decking boards. Follow the manufacturer’s instructions carefully to ensure that you’re using the product correctly. After applying the stripper, you may need to scrub the surface of your deck and then rinse it off to achieve a clean finish.
If you find rotten boards in your deck, it’s time to remove and replace them with new boards. Check the length of the boards and ensure that they are treated pine to resist future damage. After replacing the damaged boards, you can continue with the restoration process by sanding and applying a new finish.
To ensure that your deck is fully prepared for restoration, start by cleaning the surface and removing any old coatings. Check for any damage, such as rotten or cracked boards, and replace them as needed. Finally, allow the deck to dry completely before applying any oil or stain for the best results.
For a weathered deck, a semi-transparent deck oil is a great choice as it enhances the wood’s natural beauty while providing protection. When choosing a type of coating, consider the look you’re going for and the manufacturer’s instructions for application. This will help you achieve the desired look while ensuring the longevity of your deck.
To clean your deck effectively, use a pressure washer to remove dirt and grime. If there are stubborn stains, you may need to apply a paint stripper or wood stripper to help lift them. After cleaning, allow the entire deck to dry completely, and then sand the surface to prepare it for the new finish.
If your deck looks tired and you can’t get it back to its original state, you may need to consider replacing damaged boards and reviving a tired timber deck with a fresh finish. Follow the steps to reviving a tired deck by cleaning, sanding with a sand or strip, and applying a new coat of deck oil or stain. This will help give it a fresh look and protect it from further damage.
For timber deck restoration, you can use a decking oil like Ronseal Decking Oil or Osmo Decking Oil to protect and nourish the wood. Before applying the oil, use a decking stripper or cleaner like Owatrol Prepdeck to remove any old finishes, stains, or marks and prepare the deck for treatment. Always follow the manufacturer’s instructions when using decking oils and strippers, and allow the wood to fully dry before applying the oil.
Request a quote
Related Posts
-
 Trex vs. Ekodeck: A Review of Top Composite Brands for Your Sydney Home
 -
 Pool Decking Requirements in NSW: Slip Ratings & Safety
 -
 Timber Deck Restoration vs. Replacement: When Can It Be Saved?
 -
 Merbau vs. Spotted Gum: Choosing theRight Timber for Your Sydney Deck
 -
 Timber Window Repair vs. Replacement: Saving Your Heritage Charm
 -
 Solid Timber vs. Hollow Core: Is the Investment Worth It?
 -
 Custom Timber Gates in Sydney: Where Security Meets Curb Appeal
 -
 Lapped and Capped vs. Standard Paling: Which Timber Fence is Best?
Ready to Start Your Dream Project?
Reach out to us today and take the first step towards a stunning addition to your Sydney home..
- Licensed And Insured
- 35+ Years Experience
- No-Obligation Free Quotes
SYDNEY DECKING SOLUTIONS
- 0411 763 469
-
7:30am - 5:00pm
Monday - Friday
© 2024 Sydney Decking Solutions. Website created by KC Web Design